


这次给大家带来Mac系统内安装PHP Xdebug步骤详解,Mac系统内安装PHP Xdebug的注意事项有哪些,下面就是实战案例,一起来看一下。
Mac下安装PHP调试工具Xdebug
安装步骤
brew install php70
brew install php70-xdebug
php -i | grep xdebug.ini找到xdebug.ini的配置文件我的是/usr/local/etc/php/7.0/conf.d/ext-xdebug.ini
vim /usr/local/etc/php/7.0/conf.d/ext-xdebug.ini
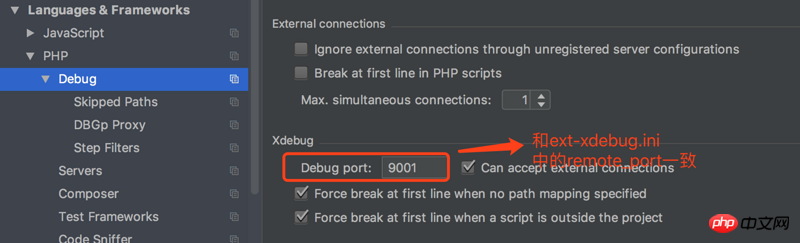
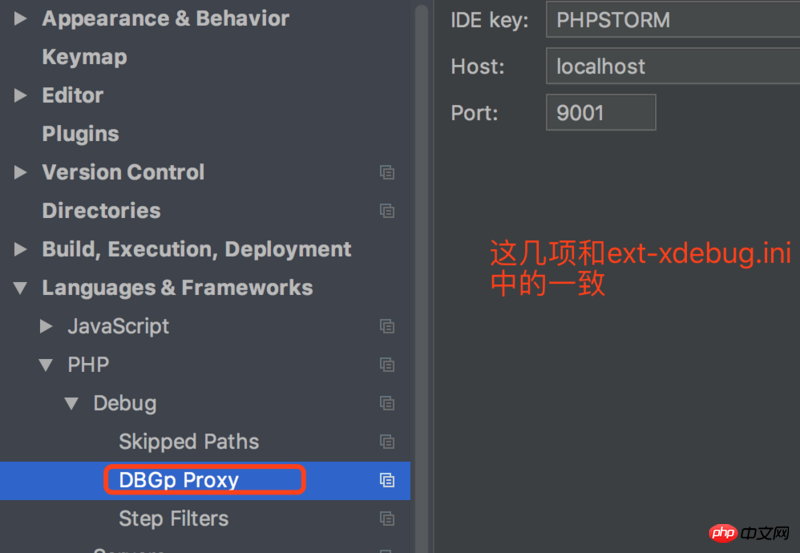
配置如下:
[xdebug]
zend_extension="/usr/local/opt/php70-xdebug/xdebug.so"
xdebug.remote_enable = On
xdebug.remote_handler = dbgp
xdebug.remote_host= localhost
xdebug.remote_port = 9001  #这个端口不要被占用即可,可以自行指定
xdebug.idekey = PHPSTORM
xdebug.remote_autostart=1
xdebug.remote_log=/var/tmp/xdebug.log
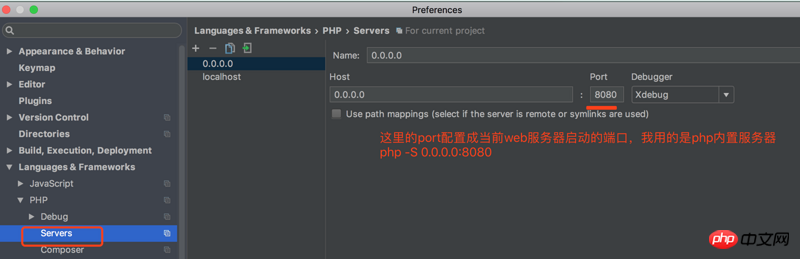
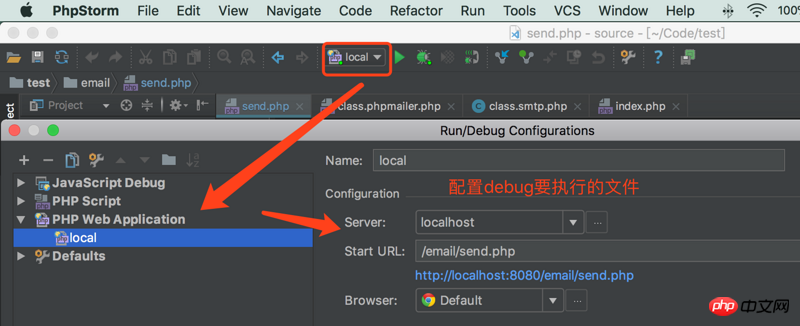
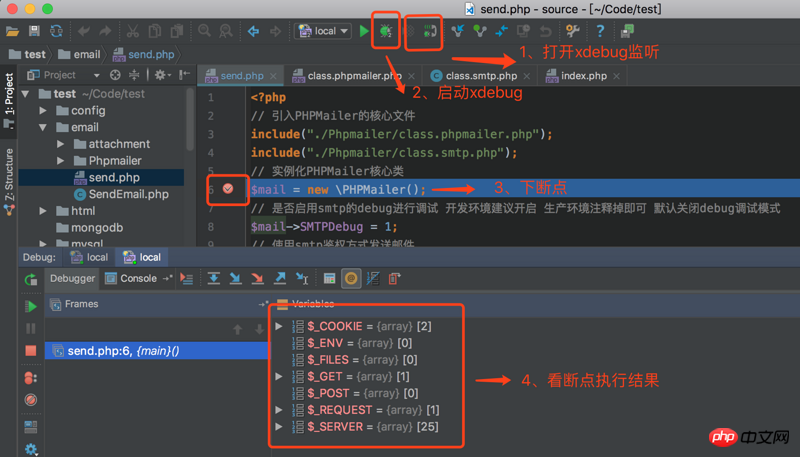
在PHPStorm中配置
相信看了本文案例你已经掌握了方法,更多精彩请关注php中文网其它相关文章!
推荐阅读:

乐活途—购物分享社区 X2.0
下载
安装说明重要提醒:程序不支持二级目录安装,请使用一级目录或二级目录绑定!第一步,确定你的服务器支持PHP+mysql。第二步,确定你的服务器开启了gd库。第三步,将upload文件内的文件上传到网站的根目录第四步,访问你的域名+ /install/index.html进行安装,linux系统访问你的域名+ /Install/index.html第五步,按照安装程序步骤进行安装配置第六步,安装完毕后


