


该项目旨在通过技术手段将“直男话术”转化为高情商表达,以增进情侣感情。其核心是让虚拟女友纠正不当话语,具体步骤如下:首先,输入直男语句(如“多喝热水”)转换为对应编号的高情商表达;接着用Pixel2Pixel模型将卡通照片真人化;再将真人化照片输入PaddleBoBo生成女友动画;最后让虚拟女友纠正话语。项目需32GB以上显卡环境,依赖相关模型和工具实现。
☞☞☞AI 智能聊天, 问答助手, AI 智能搜索, 免费无限量使用 DeepSeek R1 模型☜☜☜
虚拟女友纠正话语器
情侣之间相处少不了摩擦,但是据发现很多不必要的吵架,往往是词不达意造成的。比如关心她的身体健康,要注意身体,往往就只说了句“多喝热水”。如果换成另外一种表达,会让对方更容易接受,也更容易接收你给的爱意。因此“会说话”就变得十分重要了。这个项目就给大家一个初步的示范,怎么样的高情商的回答会让这段感情升温。
主要内容借鉴了我之前的项目:打造一个专属自己的卡通真人化主播
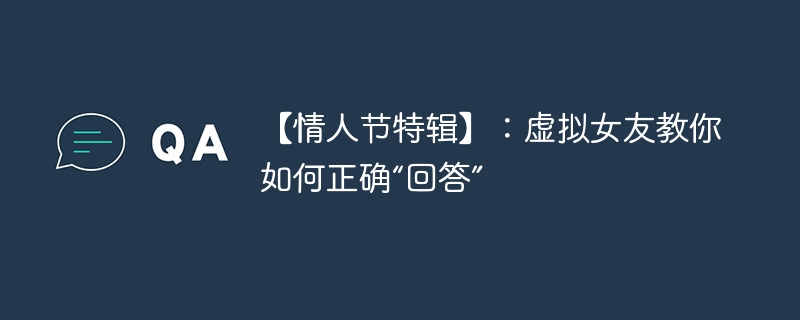
例如输入这张照片以及直男话术,你觉得会呈现出什么效果的视频呢?(doge)
直男语句:多喝热水。
效果展示
整体实现:
1.输入直男话语切换成高情商语句
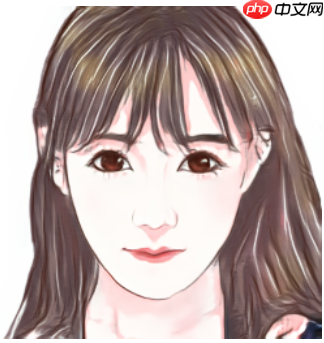
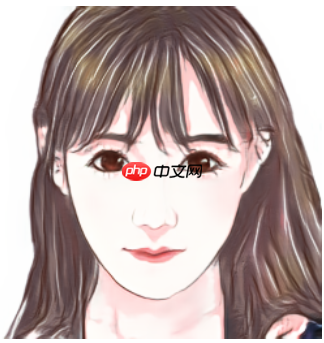
2.利用Pixel2Pixel模型实现卡通照片真人化
3.把真人化输出的照片输入进PaddleBoBo生成女友动画
4.让虚拟女友纠正你的话语
PS:执行此项目请使用32GB显卡以上环境(看PaddleBoBo作者项目有提到,用16GB会爆内存导致跑不通,且本次项目也是在32GB显卡环境上制作的)

In [ ]
huashu_dict={'多喝热水':'a', '你怎么又生气了':'b', '你又怎么了':'c', '你要这样想我也没办法':'d', '随便你!你定吧':'e', '哦':'f'}#请输入上面指定语句(粗糙版,请大家多多包涵)a = input('请输入直男语句:'+'\n')if a in huashu_dict: print('已生成合适的话术'+'\n'+'请记住生成编号'+':'+huashu_dict.get(a))else: print('不好意思,这句话我还没学会呢。')请输入直男语句: 已生成合适的话术 请记住生成编号:a
第二步、利用Pixel2Pixel模型实现卡通照片真人化
主要是修改 image_name='01503.png',改成自己心仪的动漫照片(最好使用逆向思维:卡通照片真人化项目里面数据集的照片文件,其他动漫照片生成效果不好看,我不负责的哈)
In [ ]
import paddleimport paddle.nn as nnfrom paddle.io import Dataset, DataLoaderimport osimport cv2import numpy as npfrom tqdm import tqdmimport matplotlib.pyplot as pltimport PIL.Image as Image
%matplotlib inlineclass UnetGenerator(nn.Layer):
    def __init__(self, input_nc=3, output_nc=3, ngf=64):
        super(UnetGenerator, self).__init__()

        self.down1 = nn.Conv2D(input_nc, ngf, kernel_size=4, stride=2, padding=1)
        self.down2 = Downsample(ngf, ngf*2)
        self.down3 = Downsample(ngf*2, ngf*4)
        self.down4 = Downsample(ngf*4, ngf*8)
        self.down5 = Downsample(ngf*8, ngf*8)
        self.down6 = Downsample(ngf*8, ngf*8)
        self.down7 = Downsample(ngf*8, ngf*8)

        self.center = Downsample(ngf*8, ngf*8)

        self.up7 = Upsample(ngf*8, ngf*8, use_dropout=True)
        self.up6 = Upsample(ngf*8*2, ngf*8, use_dropout=True)
        self.up5 = Upsample(ngf*8*2, ngf*8, use_dropout=True)
        self.up4 = Upsample(ngf*8*2, ngf*8)
        self.up3 = Upsample(ngf*8*2, ngf*4)
        self.up2 = Upsample(ngf*4*2, ngf*2)
        self.up1 = Upsample(ngf*2*2, ngf)

        self.output_block = nn.Sequential(
            nn.ReLU(),
            nn.Conv2DTranspose(ngf*2, output_nc, kernel_size=4, stride=2, padding=1),
            nn.Tanh()
        )    def forward(self, x):
        d1 = self.down1(x)
        d2 = self.down2(d1)
        d3 = self.down3(d2)
        d4 = self.down4(d3)
        d5 = self.down5(d4)
        d6 = self.down6(d5)
        d7 = self.down7(d6)

        c = self.center(d7)

        x = self.up7(c, d7)
        x = self.up6(x, d6)
        x = self.up5(x, d5)
        x = self.up4(x, d4)
        x = self.up3(x, d3)
        x = self.up2(x, d2)
        x = self.up1(x, d1)

        x = self.output_block(x)        return xclass Downsample(nn.Layer):
    # LeakyReLU => conv => batch norm
    def __init__(self, in_dim, out_dim, kernel_size=4, stride=2, padding=1):
        super(Downsample, self).__init__()

        self.layers = nn.Sequential(
            nn.LeakyReLU(0.2),
            nn.Conv2D(in_dim, out_dim, kernel_size, stride, padding, bias_attr=False),
            nn.BatchNorm2D(out_dim)
        )    def forward(self, x):
        x = self.layers(x)        return xclass Upsample(nn.Layer):
    # ReLU => deconv => batch norm => dropout
    def __init__(self, in_dim, out_dim, kernel_size=4, stride=2, padding=1, use_dropout=False):
        super(Upsample, self).__init__()

        sequence = [
            nn.ReLU(),
            nn.Conv2DTranspose(in_dim, out_dim, kernel_size, stride, padding, bias_attr=False),
            nn.BatchNorm2D(out_dim)
        ]        if use_dropout:
            sequence.append(nn.Dropout(p=0.5))

        self.layers = nn.Sequential(*sequence)    def forward(self, x, skip):
        x = self.layers(x)
        x = paddle.concat([x, skip], axis=1)        return x#实例化生成器generator = UnetGenerator()#加载权重last_weights_path = 'data/data148534/epoch100.pdparams'print('加载权重:', last_weights_path)

model_state_dict = paddle.load(last_weights_path)
generator.load_dict(model_state_dict)
generator.eval()#读取数据image_name='01503.png'img_A2B = cv2.imread('work/'+image_name)
img_A = img_A2B[:, 256:]                                  # 卡通图(即输入)img_B = img_A2B[:, :256]                                  # 真人图(即预测结果)g_input = img_A.astype('float32') / 127.5 - 1             # 归一化g_input = g_input[np.newaxis, ...].transpose(0, 3, 1, 2)  # NHWC -> NCHWg_input = paddle.to_tensor(g_input)                       # numpy -> tensorg_output = generator(g_input)
g_output = g_output.detach().numpy()                      # tensor -> numpyg_output = g_output.transpose(0, 2, 3, 1)[0]              # NCHW -> NHWCg_output = g_output * 127.5 + 127.5                       # 反归一化g_output = g_output.astype(np.uint8)#只保存生成真人图像img = np.asarray(g_output).copy()
img = Image.fromarray(cv2.cvtColor(img,cv2.COLOR_BGR2RGB))# cv2 to Imageimg.save('work/'+'output_'+image_name)

img_show = np.hstack([img_A, g_output])[:,:,::-1]
plt.figure(figsize=(8, 8))
plt.imshow(img_show)
plt.show()
/opt/conda/envs/python35-paddle120-env/lib/python3.7/site-packages/matplotlib/__init__.py:107: DeprecationWarning: Using or importing the ABCs from 'collections' instead of from 'collections.abc' is deprecated, and in 3.8 it will stop working from collections import MutableMapping /opt/conda/envs/python35-paddle120-env/lib/python3.7/site-packages/matplotlib/rcsetup.py:20: DeprecationWarning: Using or importing the ABCs from 'collections' instead of from 'collections.abc' is deprecated, and in 3.8 it will stop working from collections import Iterable, Mapping /opt/conda/envs/python35-paddle120-env/lib/python3.7/site-packages/matplotlib/colors.py:53: DeprecationWarning: Using or importing the ABCs from 'collections' instead of from 'collections.abc' is deprecated, and in 3.8 it will stop working from collections import Sized W0728 22:24:44.614435 192 gpu_resources.cc:61] Please NOTE: device: 0, GPU Compute Capability: 7.0, Driver API Version: 11.2, Runtime API Version: 10.1 W0728 22:24:44.619457 192 gpu_resources.cc:91] device: 0, cuDNN Version: 7.6.
加载权重: data/data148534/epoch100.pdparams
/opt/conda/envs/python35-paddle120-env/lib/python3.7/site-packages/matplotlib/cbook/__init__.py:2349: DeprecationWarning: Using or importing the ABCs from 'collections' instead of from 'collections.abc' is deprecated, and in 3.8 it will stop working
  if isinstance(obj, collections.Iterator):
/opt/conda/envs/python35-paddle120-env/lib/python3.7/site-packages/matplotlib/cbook/__init__.py:2366: DeprecationWarning: Using or importing the ABCs from 'collections' instead of from 'collections.abc' is deprecated, and in 3.8 it will stop working
  return list(data) if isinstance(data, collections.MappingView) else data
<Figure size 576x576 with 1 Axes>
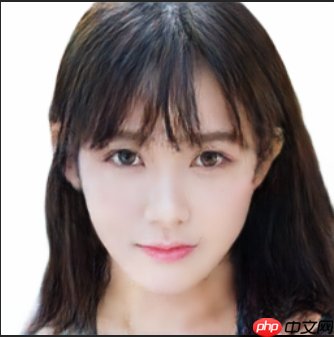
效果展示
变身!!!
第三步、把真人化输出的照片输入进paddlebobo生成虚拟女友动画
3.1解压压缩包
In [11]
!tar xzvf bobo.tar.gz PaddleBoBo data nltk_data work
3.2安装PaddleGAN和PaddleSpeech依赖
In [ ]
#这一步执行时间会比较久!pip install ppgan paddlespeech
3.3动漫真人化图像生成虚拟女友动画
这一步用到了default.yaml的配置文件,如果你只是尝试的话使用默认配置即可,如果你需要生成另一个人像,请修改default.yaml配置。主要是修改输入照片的位置:PaddleBoBo/default.yaml 里面的FOM_INPUT_IMAGE: '/home/aistudio/work/output_01503.png'
In [ ]
%cd PaddleBoBo
!python create_virtual_human.py --config default.yaml
第四步、让虚拟女友纠正你的话语
--text 请输入之前生成的编号
In [ ]
!python general_demo.py --human ./file/input/test.mp4 --output ../output.mp4 --text a


